If you view a painting from an angle or through a cylindrical mirror, it looks distorted. An anamorphosis is a painting that is painted in such a way that it takes into account this distortion and seems undistorted when looked at from an angle or through a cylindrical mirror. But of course if you look at it straight, without any mirrors, they are distorted.
This is a surprisingly popular technique in art, but also used in everydays life. If you watch football on TV, the advertisements close to the goal compensate for the distortion to look undistorted for the main camera. When viewed from the reverse angle, they are stretched very long. Things written on the road ("Bus" or "Bike lane" or "Stop" or "Drive slow") are also painted stretched to make them easier to read for drivers in their cars.
A few weeks ago, the place where I work participated in the local "Night of the Museums", an event, where museums and other interesting places are open to the public until midnight, with shuttle busses connecting them, a common ticket, and lots of special activities. The general theme was "True or false", and we chose to prepare some optical illusions.
I chose to do a large scale perspective anamorphosis in front of the building as a street painting. There are some really fantastic examples of that, which can be found on the net (e.g. here), done by people who really have a lot of artistic skills.
So I sat down and worked out the math, which turned out to be quite simple. The idea is to assume a point observer, that collects all the light rays meeting at this point. This point observer has only one eye and therefore he can not decide from which point along a ray the light was emitted.
To create a perspective anamorphosis streetpainting that creates the illusion of a three dimensional object, one has to find all the rays from the object that meet in the observer point, extend the rays back to the floor plane if necessary, and determine the point, where the ray intersects the floor plane. This way we can find the points on the floor plane that correspond to the points of the three dimensional object. The math is very easy, only a little linear algebra.
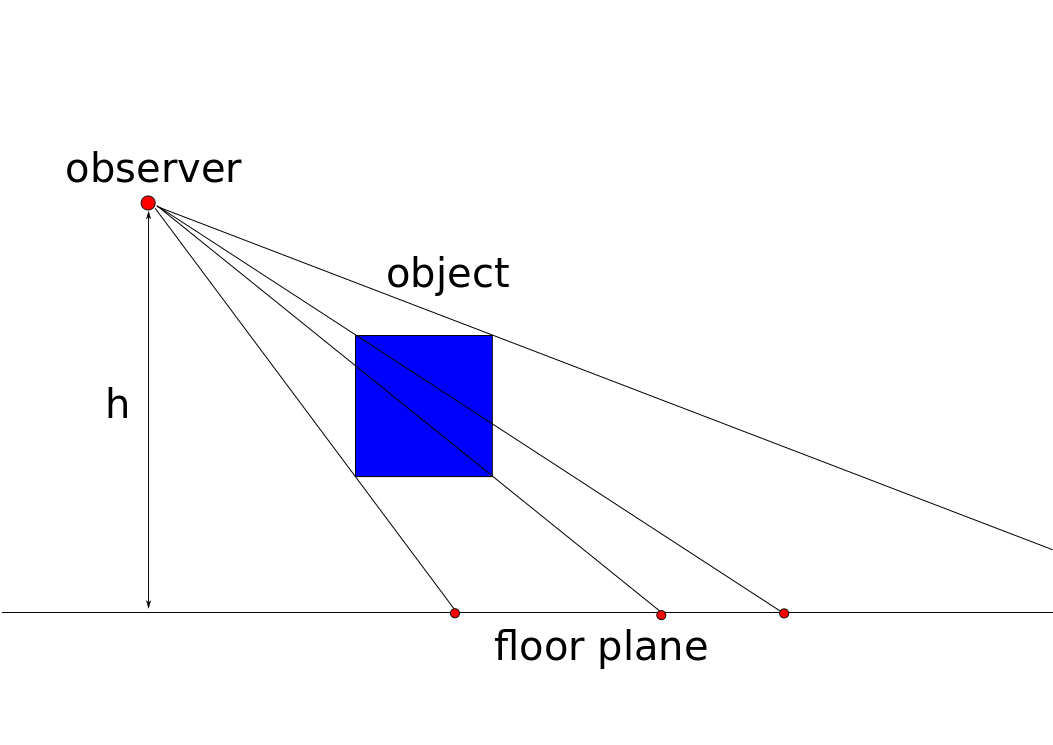
Illustration of the principle used to determine the points in the floor plane corresponding to points in a 3D object used to create anamorphic paintings.
For practical application this ray tracing procedure needs to be done for many points, therefore I wrote a bit of code to automate it. The three dimensional object that is required as input can be given in form of a stl file, which means that it can be easily created in your favourite 3D modeler. My python script then extracts all points and edges from this file and finds the corresponding points and edges on the floor plane. STL is a triangle based format, so usually there are many unwanted edges, which can be filtered out. For the resulting lines and points an overview drawing is created in the svg format. The code is on github.
It is not easy to determine points precisely in a painting with dimensions of several meters. Giving x and y coordinates is not good, because it is difficult to determine sufficiently precise right angles over such large distances. For this reason, the point coordinates are given as distances to two reference points, it is much easier to measure such distances with sufficient precision using a tape measure.
The code and the general procedure was refined over several tests that we did using ordinary sidewalk chalk from the toy store. The results were promising. It turns out the effect is much better on photographies than in reality, because the camera is a quite good realisation of to the point observer that we assumed for the construction.
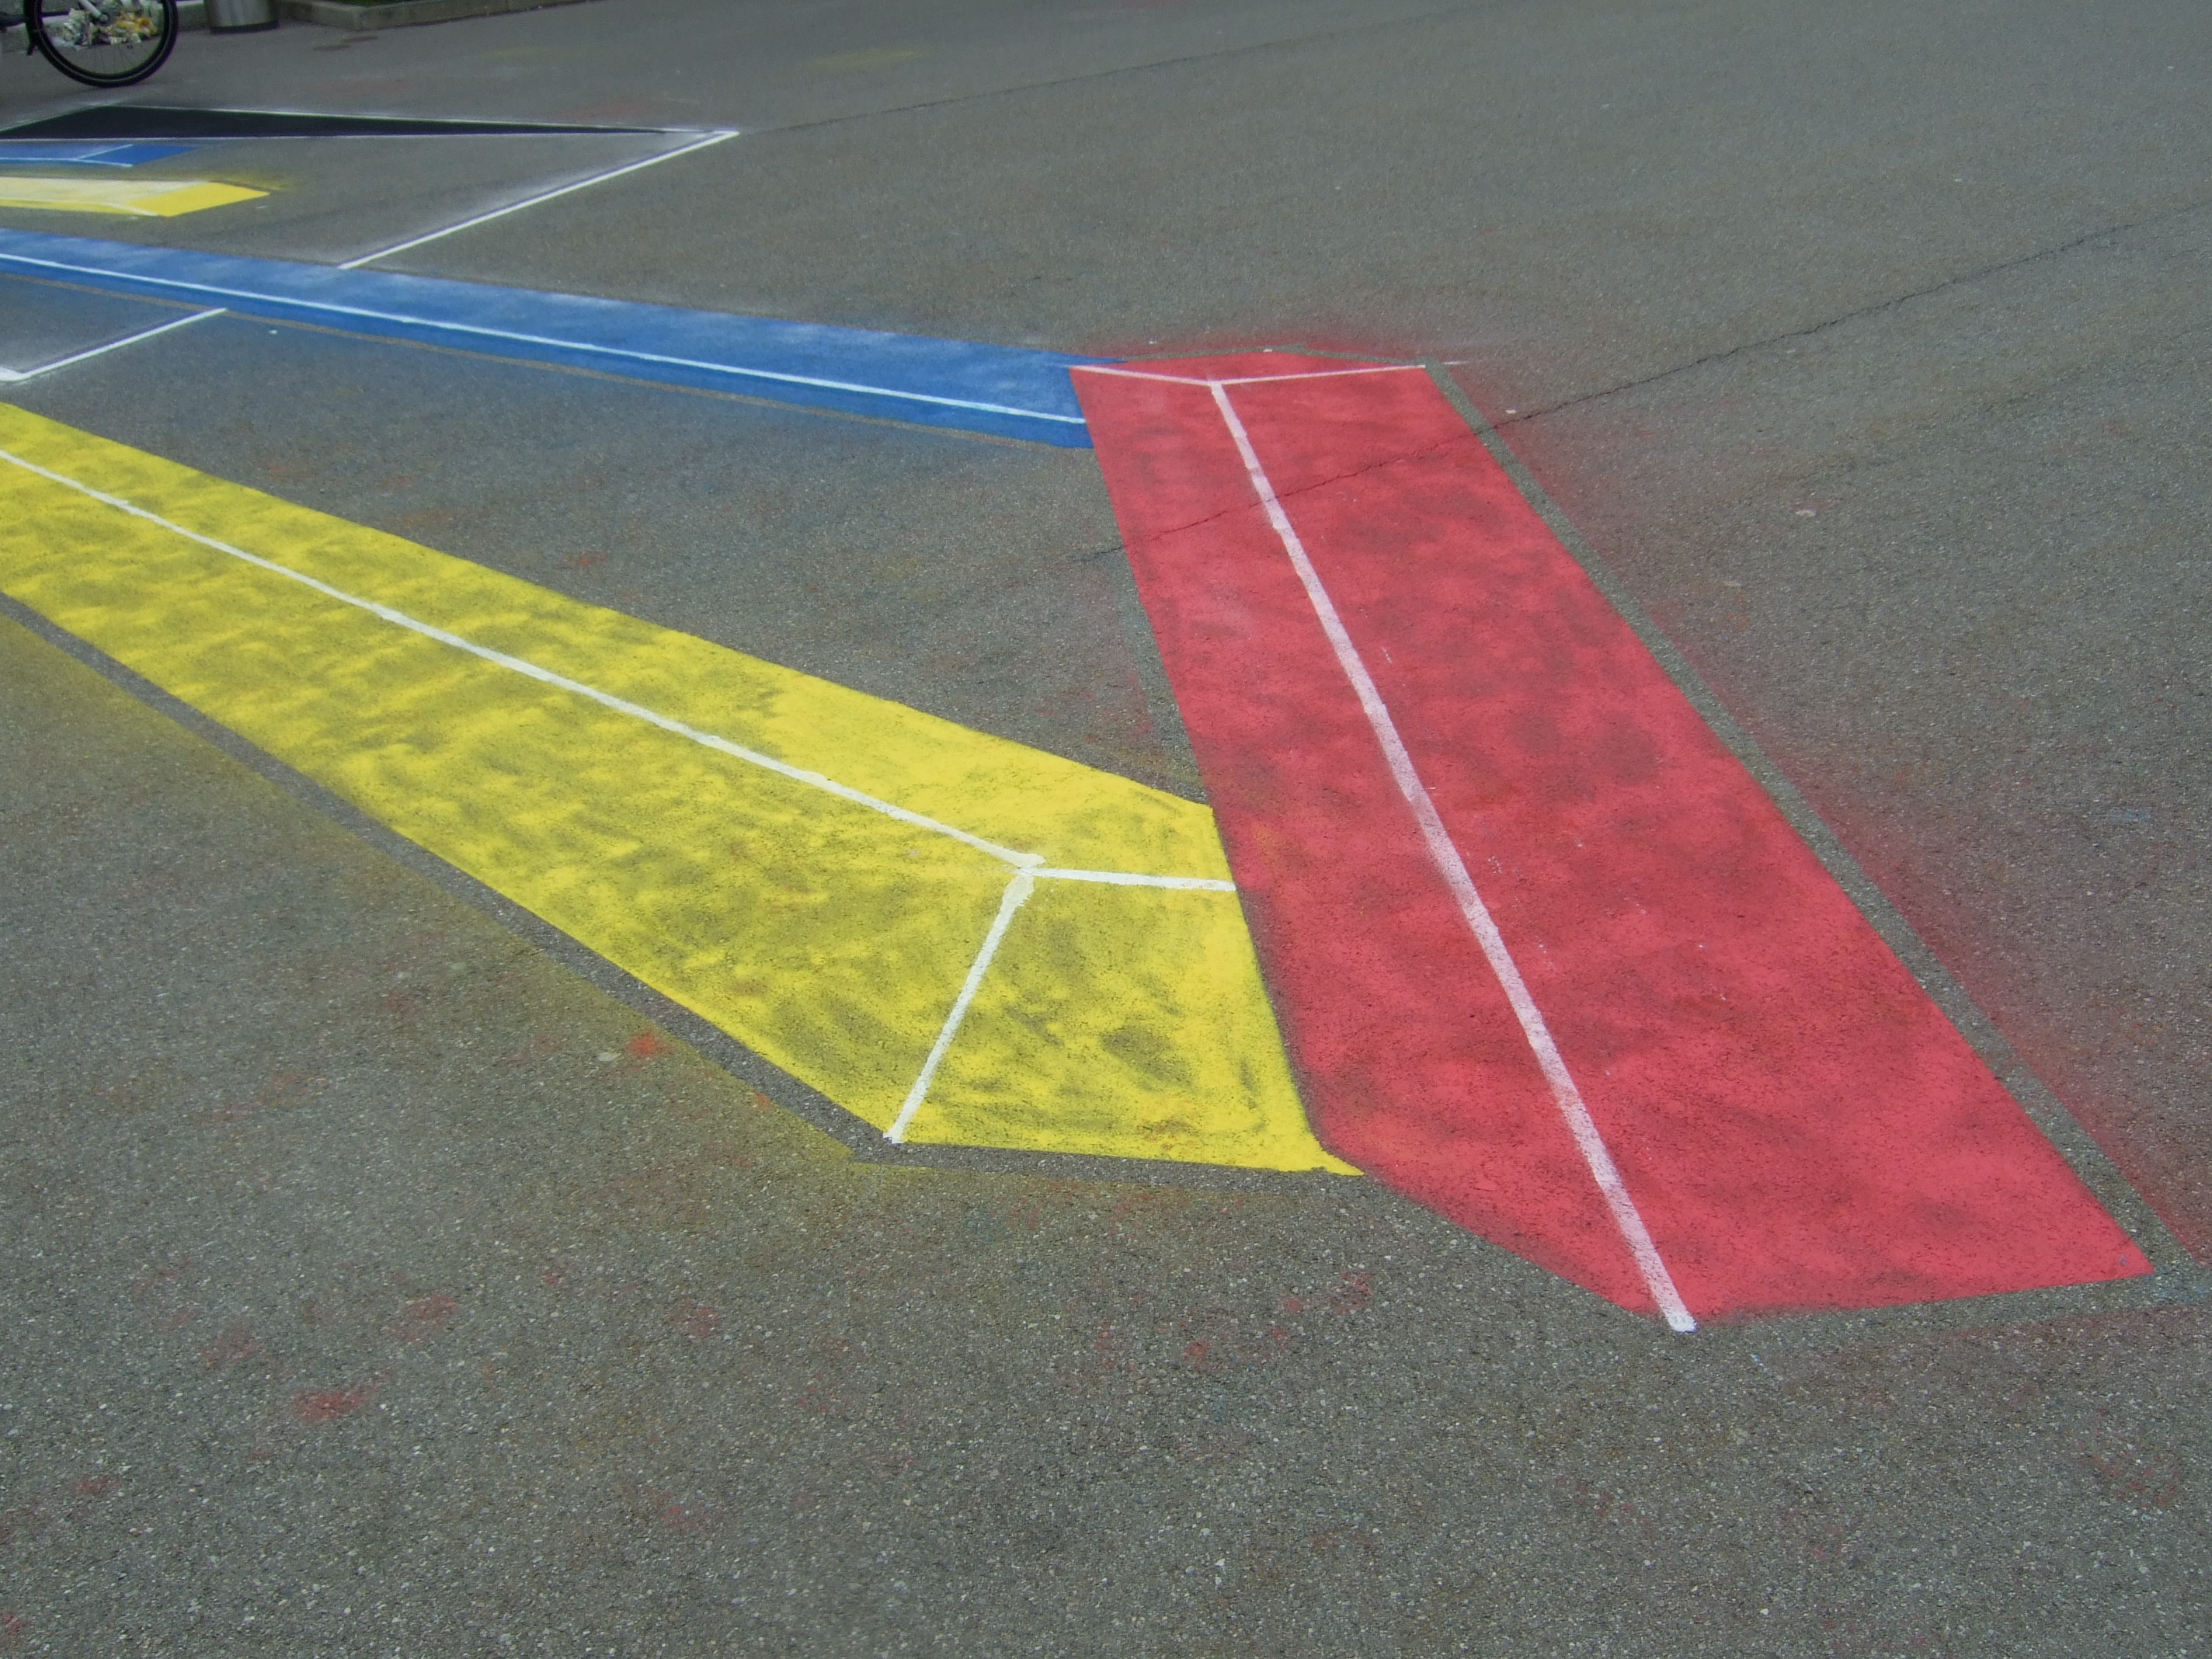
However, sidewalk chalk is not optimal, as it doesn't cover very well. The real painting was therefore done in spray chalk, which covers very well, but was a bit difficult to handle. We used six or seven cans for a painting of about 6m x 10m. Here are some impressions of the thing:

In the making. Masking tape is a very useful helper. We used lots of it. It was very windy. For this reason there is spray chalk mist at some places and for some of the long lines the edges are not straight, but curved.
View of the finished painting from the opposite angle. The white lines and the shading of some areas help a lot to make the effect easily visible.
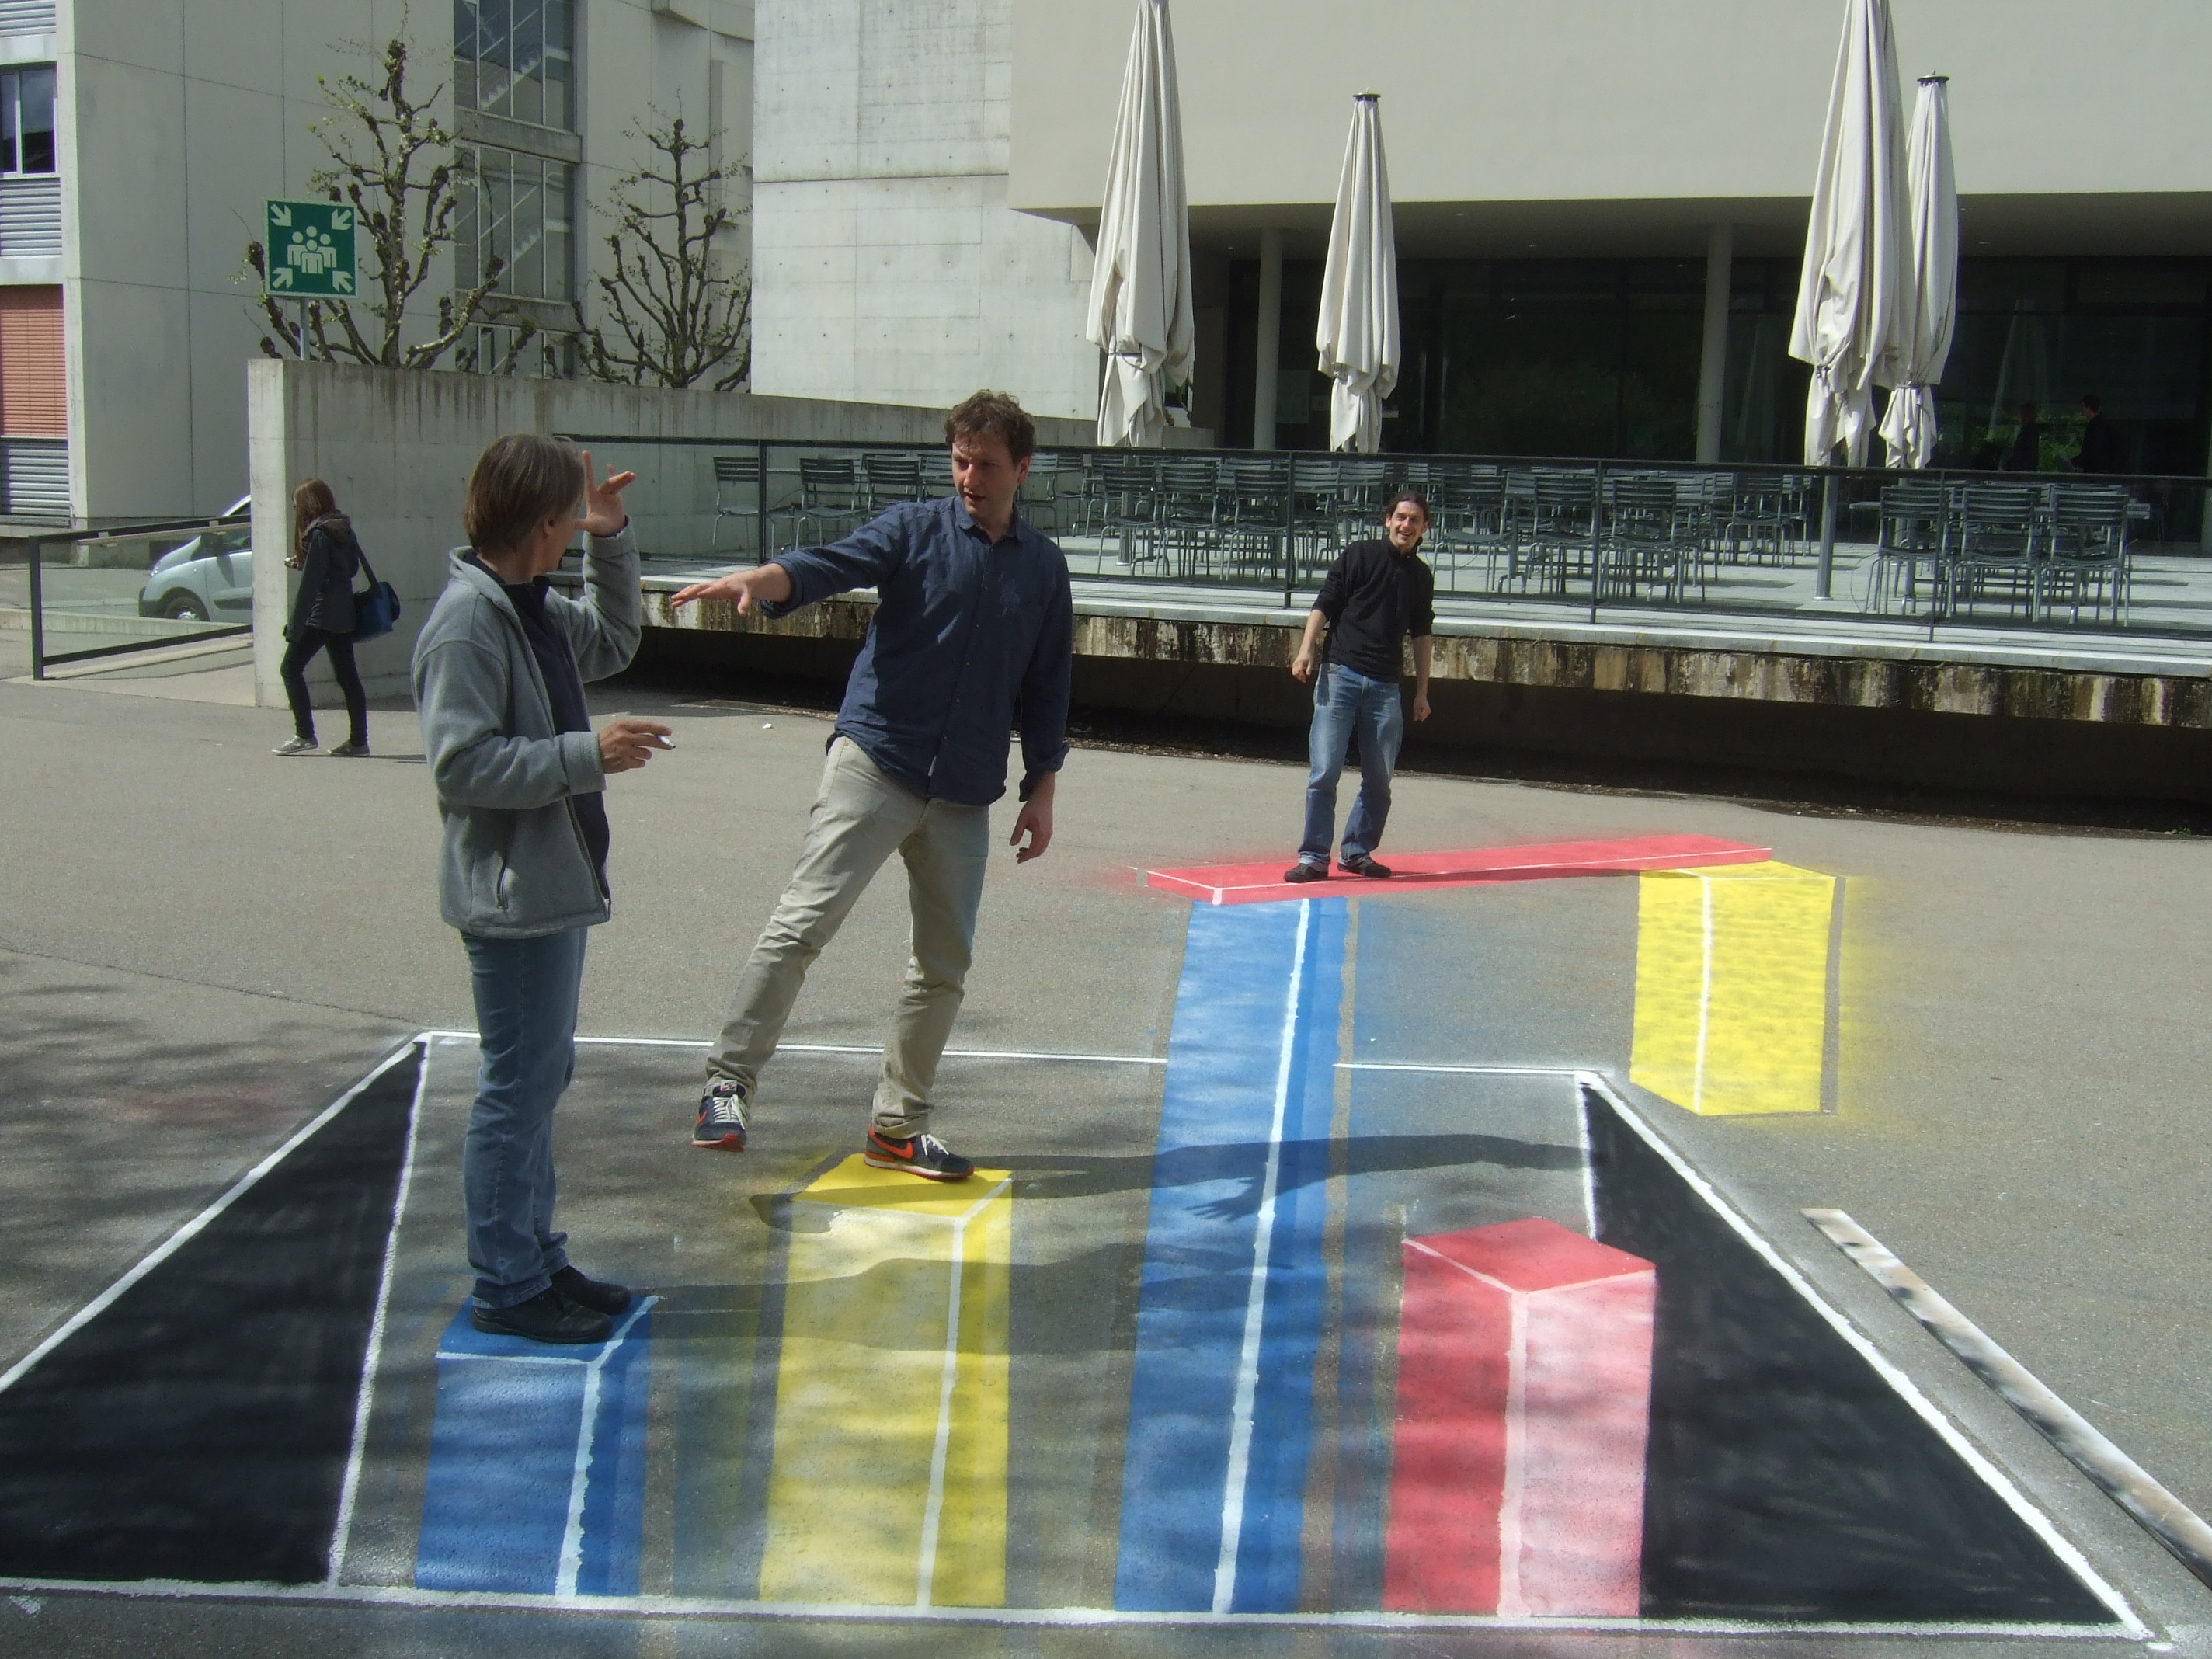
People in the painting. The shadows of the people and the trees nearby give it away, but otherwise it works quite well.
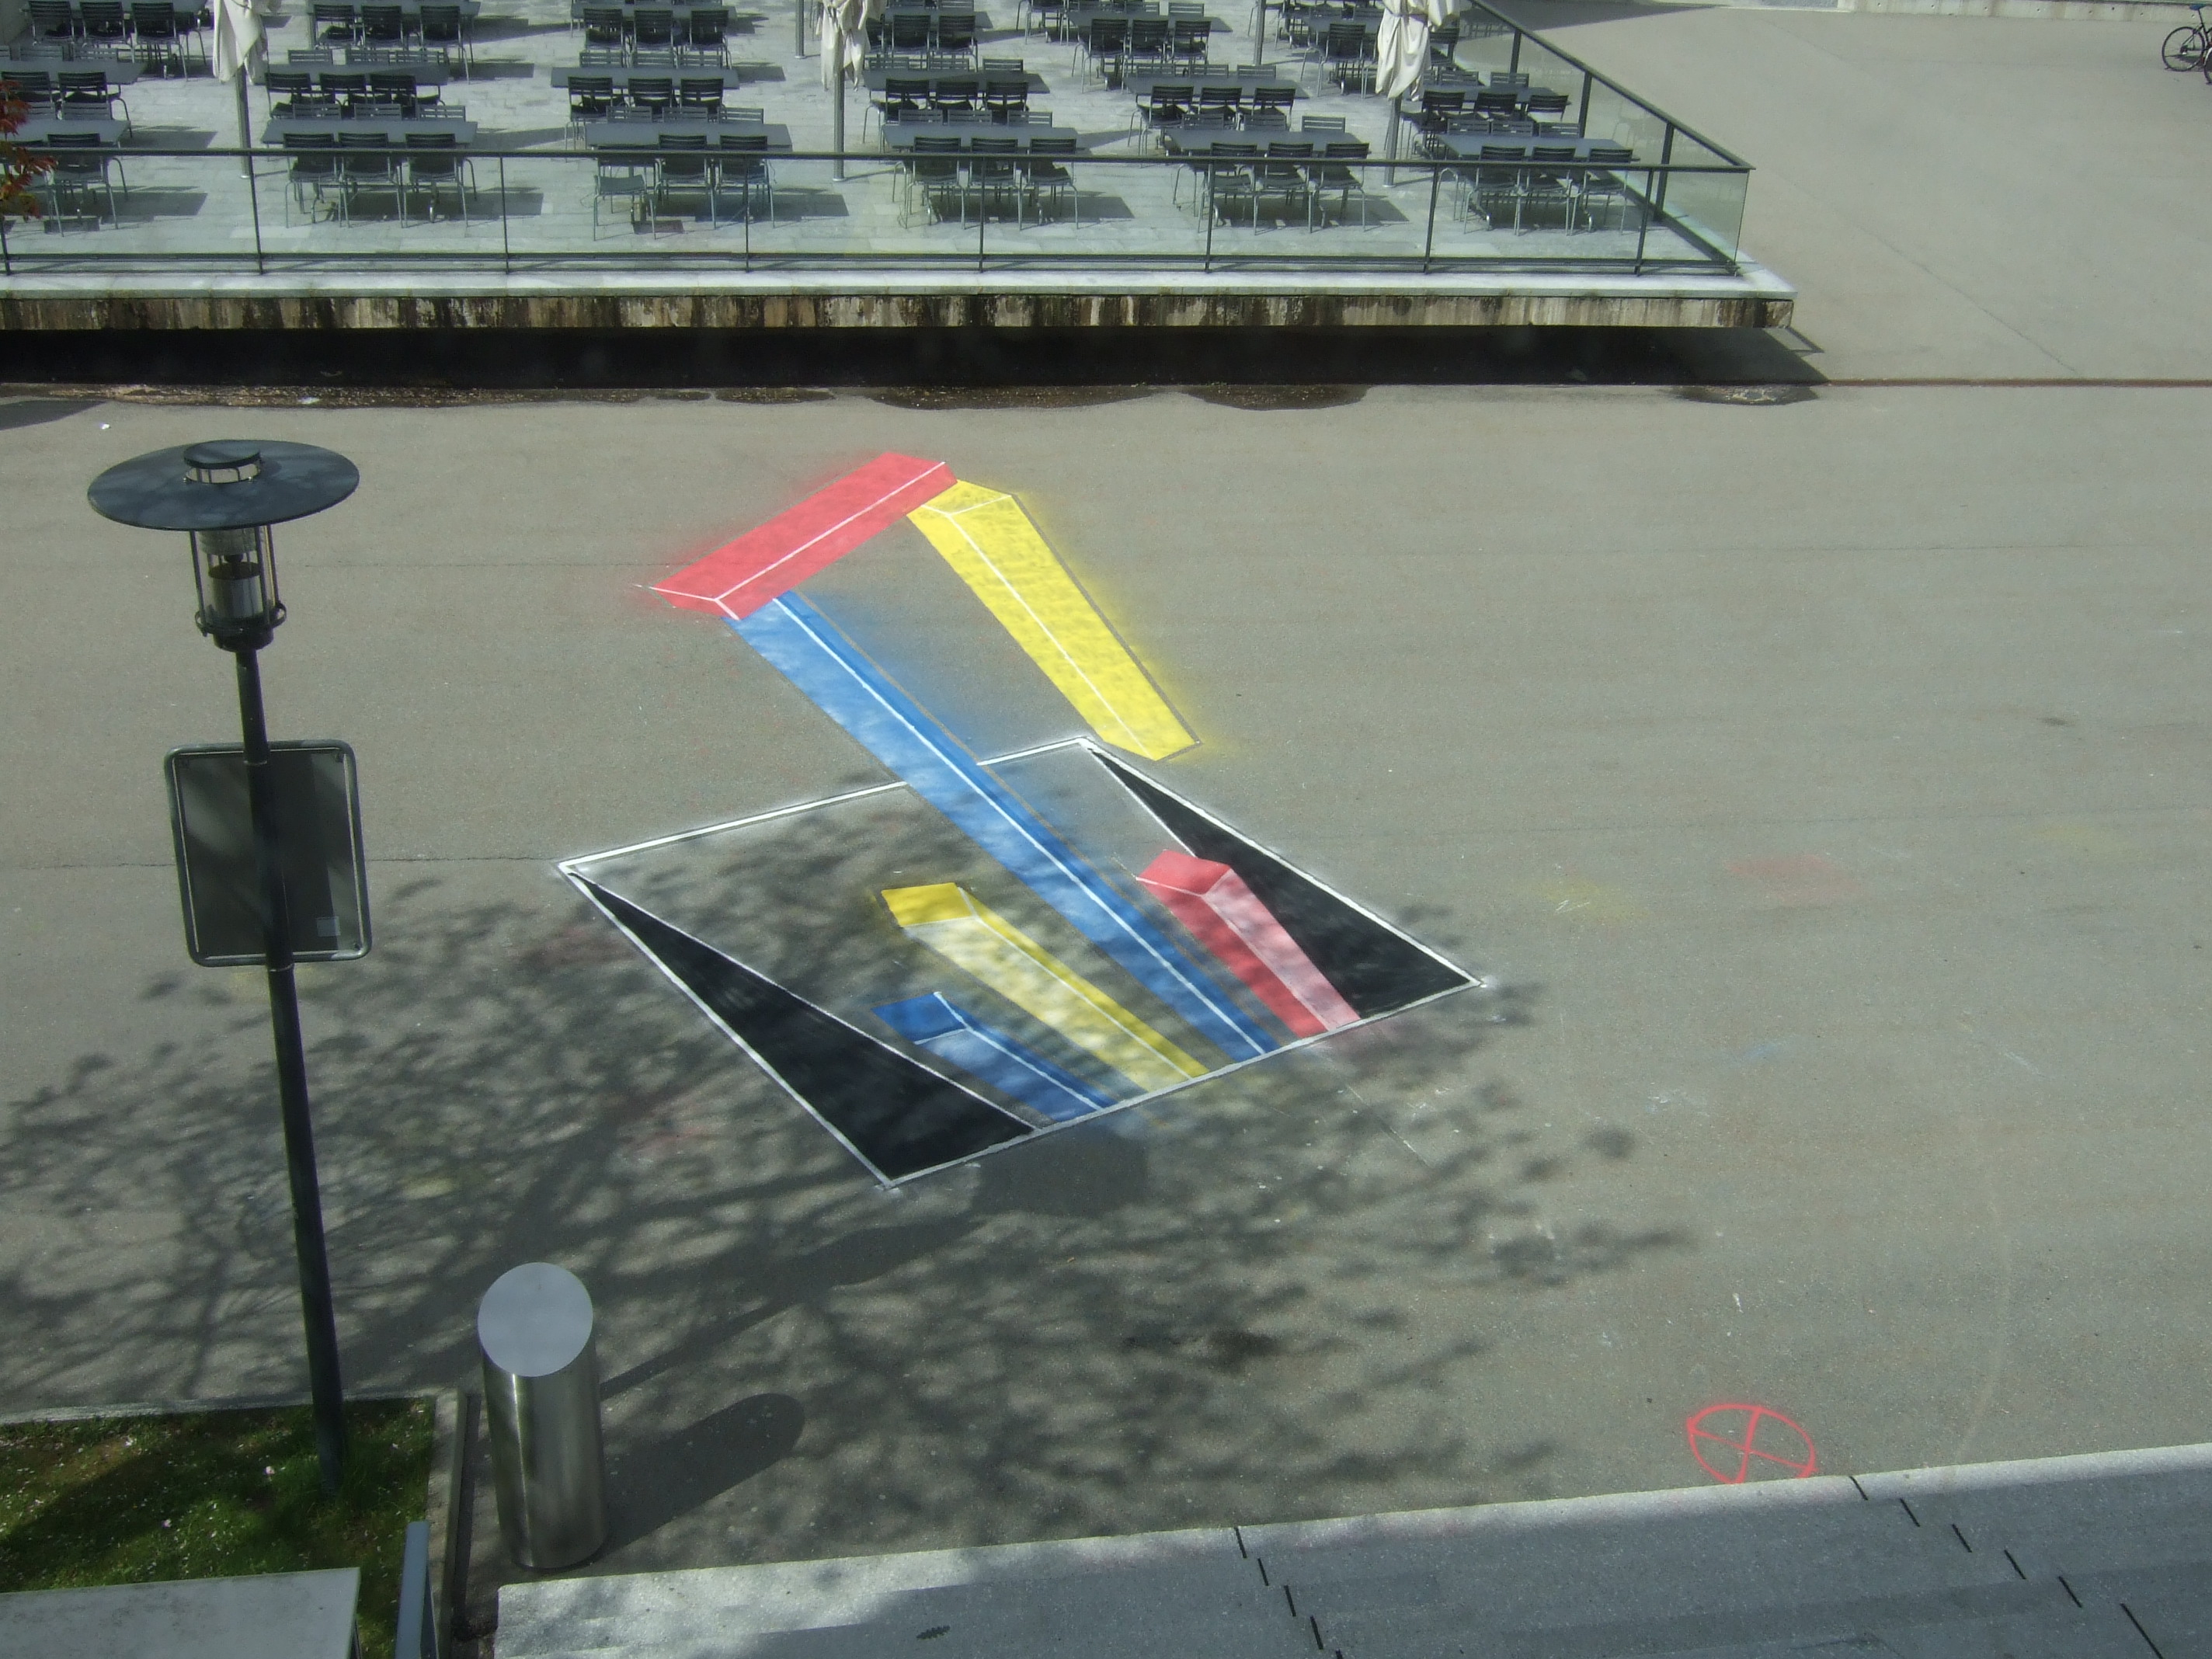
Birds eye overview. The red circled cross in the lower right corner is the magical spot.